Postgraduate Diploma Photography Portfolio Development

Mamiya RB67 ProS

20150604-4917(WEB)

Mamiya-Sekor C 90mm f3.8


Recently I bought myself a set of medium format camera, the RB67 ProS. I bought the camera with 3 lenses. I decided to have some fun shooting my new friend. 😀

20150604-4918(WEB)

Mamiya-Sekor C 50mm f4.5

20150604-4921(WEB)

Mamiya-Sekor C 180mm f4.5

They are all very beautiful! which one do you prefer? I took some photo from the camera, and it was shockingly good in image quality, the only downside for this system is the size! It is a lot bigger then the famous medium format film camera-Hasselblad. Since my summer break has started I am definitely brining my Mamiya camera set out for a shoot soon. I would like to experiment with film photography more!


Etretat, Normandy, France

etretat 1

After Paris, Me and my friend drove to Etretat. I saw some nice photos of the landscape in Etretat and that is why I chose to go there, but landscape it’s not the only thing that is beautiful there, the small town is full of old buildings, I felt as if I am in some kind of medieval computer game. We went out for a walk after our dinner, and we saw this beautiful old building- the old market hall in Place Foch. The market hall was gated and we can’t get into it, the only thing I manage to do is to take a photo through a hole in the gate. The photo above is the interior of the old market hall, it’s a panoramic done with my Samyang 24mm tilt shift lens. When I am taking this photo, a mysterious cat walked in the market hall and stood in the middle of the walkway staring at us for some time, that’s why even with a 30 seconds exposure time the cat is still visible. When I found out that the cat stud there staring at us for so long, it feels kinda creepy. 😛

untitled-8824

One of the beautiful cliffs at Etretat, The falaise d’amont. When I travel I like to go to beautiful natural places compared to big cities. I love begin there, enjoying what mother nature had created. Setting my camera in the extreme wind, with the fear of being washed away by a sudden wave is such fun! Love and enjoy the experience really much. I am thinking of printing this photo out, and mount it on a black board, hope it will look nice. 😀

Letting mother nature do the drawing.

ARCHI_T-6.1


Wondering around London and found this interesting spot to take photo. Actually I saw photos of this place online before, when I look up and realised that I have stumbled upon a very nice photographic point. I then set up my tripod in the middle of the walkway ignoring every one around me and starts to take photos upwards. I can’t get what I wanted for the first few shot, the sky are too gloomy and covered by thick clouds. I decided to stay there and wait for awhile, after around 10 minutes, the clouds started to clear and they are moving quite fast across the deep blue sky. Finally my patient pays off, since I am already set up for the shot, I just press on the shutter and let mother nature paint a background for my shot. 🙂

Architecture + time

My recent project is to capture architecture and time together. These are the result after my solo photo-walk a couple of weeks ago.

ARCHI-3

No.1 London Bridge Road.

ARCHI-1

The “Walkie Talkie” at 20 Fenchurch Street. designed by Rafael Viñoly. I took this photo across the River Thames.


My first enlargement.

enlarge120_1_1

After I shot my first roll of 120 film, I did my first enlargement. It was taught by a course-mate of mine. 😀 I was surprise of how enlargement is done, it is basically taking a photo again, you have to chose a lens, and your ‘film’ the photographic paper. Then you need to set your aperture of the lens, size the projected image to the size of your paper and then focus the image projected. And then after you put your photographic paper into place (with the focusing light off) you then uses a timer machine that control the amount of time the enlarger will project the image on the paper. At first we will need to use test strips to find out the exposure needed for the end result you want, normally we will start with a 5 seconds projection of light, and expose our test strip in 3 different places for the period of 5 seconds,10 seconds, and 15 seconds. If you are lucky, you will get the perfect exposure that you wanted from one of the exposure, but most of the time we will need to do many more test strip until we get our desirable result. After figuring out the period of time need for my shot with numerous amount of test strip, then only we can use a full size photographic paper, and to tell you the truth, I am nervous at that time. But when I see the finished photo, I am very happy with it.

I got more than what I was expecting, maybe this is where the essence of film photography is. The texture, the annoying dust that are now permanently printed on my photos, the naturally occurred frame around the photo, and finally is to be able to see a finished product that you spent hours in the dark room to create is just awesome. But this is definitely not a easy thing to do. 😀

Ilford FP4+ 120 – 1/10

120cmy-1


My first roll of 120film, shot with a Mamiya RB67 in a studio. Thanks Mauri Sherrington for being my model. This is the first exposure, and thanks to my inexperience of a medium format film camera, it’s shot too early into the film roll. But the mistake dint stop there, I scanned it with a wrong setting, thus my black and white film is now colorized. But this is my favorite photos out 10 of them. 😀

Amanda Wakeley’s Show at London Fashion Week

LFW1-1

Have the chance to shoot the runway show by designer Amanda Wakeley. This show is part of the London Fashion Week 2015.  Thanks to my university and Canon, I am able to shoot the show. 😀

LFW1-2


LFW1-3

LFW1-4 LFW1-13 LFW1-15 LFW1-16 LFW1-14  LFW1-11

Really liked her designs, like how the clean white just shows off the detail and texture of the fabric, and also enhanced the ‘wave’ created.

LFW1-20

Really liked this show, I am very happy to have gotten this chance to shot it. 😀 It’s not easy at all being a fashion runway photographer, it’s actually very tiring, but overall it’s still a wonderful experience.

Conflict, Time, Photography. Tate Modern.

Tate-1

Few days ago I visited Tate Modern for the first time, it’s actually a class trip with a lecturer. We went for the Conflict, Time, Photography exhibition. Our lecturer provided us with some quotes she printed and also some issue that she want us to think during the exhibition. One of the issue is to choose a photograph that really stands out for us, that has a real ‘punctum’ in it.

The show is about photograph that are war related, and the arrangement/theme of the exhibition is base on the period of time between the actual incident and the time when the photos are taken. This I think is very unique and really liked it.

At first, I have chosen a photograph by Don McCullin, the famous Shell Shocked Soldier. That photo was taken at the battlefield, and the emotion I see from the soldier is very strong. His body posture, his shivery hands holding his gun, and his eyes are just so ’empty’. But towards the end of the exhibition, I was caught by the last huge photograph. Its a photography of a Canadian war monument by Agata Madejska. The tittle of the photo is 25-36, and the photograph is taken 99 years after the war happened. In the photo the monument is isolated from everything around it, and the weather just engulf the monument giving it a blur so nice that it looks like the monument is fading away in front of me. The monument is almost there and not there at the same time. It really intrigued me, so I sat in front of the photo and just enjoy it for some time. Now that I think of the photo, it really portrayed the sense of time towards a war or some significant event, the mist trying to engulf the monument is just like that time is trying to erase our memory. Without the monument, maybe the event had already been forgotten long ago.

Tate-2


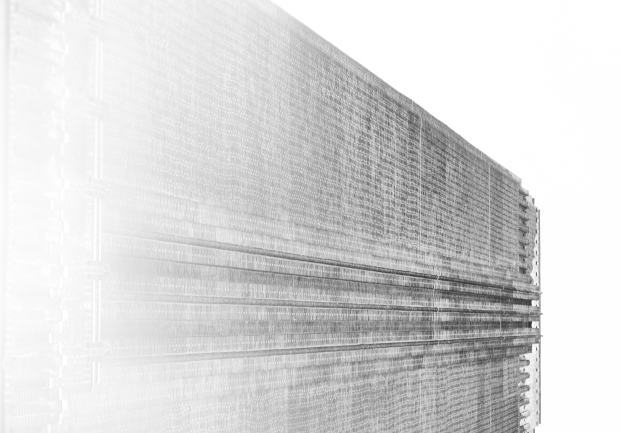
This is my photo of Tate Modern, inspired by Agata Madejska’s photo. 😀